Vision & Voice Top TECH TIPS for Getting the Best Documentary Recordings |
Recording Narration

If you consume much mass media, you may have noticed the decline of “Mr. Announcer Voice.” You know the sound. They have a big, deep voice, enunciate everything perfectly and always talk down to you. By contrast, today’s average voice over is much more conversational and casual. Gender doesn’t seem to matter either. This is good for the first-time narrator since you don’t have to supercharge your voice to get a recording that sounds current. However, you do need to speak clearly and decide where your voice character fits in the narration spectrum.
While your normal speaking voice may be fine in person, it loses a little something in a voice over. To compensate, you’ll have to crank things up just a bit. Finding the balance between natural speech and enunciation is a great place to start. Using a test recording or two, listen to your voice and make notes for any slurred phrases or indistinct words. They’re usually easy to correct with some practice. In addition, push your vocal inflection and emotion some too. It feels funny at first, but listen to the playback as you practice and you’ll hear the change. In general, if it seems a little over the top, it’s probably just right, in the context of your video.
Voice overs are something of an artform but cold reads lack the “art” in the equation. One of the most common challenges is vocal inflection. First-time voice-over artists often end each sentence in a rising tone, almost like asking a question. It’s your challenge to overcome this tendency and end non-question sentences authoritatively in a falling or neutral tone. It’s harder than it sounds, but with some practice, you can leave a strong impression with. [image:magazine_article:34629]Don’t forget to include appropriate inflection throughout your voice overs, matching the content to the tone of your voice.

It may seem obvious, but be sure to pre-read the material several times before you start recording. Reading through a script for a 30-second commercial is easy, but what if your project is a 20-minute training video filled with technical terms and chemical names? The time spent in preparation makes the final performance that much easier. This applies to both the script and the finished video. Knowing how things fit together in the final product will help with pacing. Don’t be afraid to add some emotion and excitement to the reading when necessary. And rehearse out loud. The script sounds different in your head. This will also identify any trouble words or phrases. The nemesis of the voice-over artist is hesitation in the form of umm, ahh and uhh. Play your test recordings and listen for these gremlins. Headphones help isolate the audio and you’ll be able to hear any problems with the narration better than if you listen with speakers.

Consider recording your voice over standing up. Why? There are two very good reasons. First, standing opens your breathing and makes it easier to speak clearly and consistently. By removing the compression on your breathing muscles, you make it easier to take deeper breaths. In addition, a standing position allows you to be more animated. This is a good thing. In fact, get your whole body into the performance. Imagine you’re speaking to one specific person and let go. Point, nod, wave your arms, whatever it takes. Believe it or not, these motions impact your delivery and can be felt on the finished recording.

Place your microphone in the right position. If you place the microphone too close, you get that distorted clipping sound; and if you have it too far from the narrator, you pick up more ambient noise with the audio being less discernible. By setting the microphone 6 to 12 inches from the narrator you’ll get a crisp clear voice. Also, make sure the microphone’s not right next to the computer so it doesn’t pick up the fan noise. Keep your mic cord away from your power cord. Record a quick demo to make sure that everything is working as it should. Also, I recommend shutting down other applications that are not necessary at that moment. I’ve been doing this stuff for years and it never fails that when you work with multimedia you put a strain on your computer’s resources which can impact your recording session.
Before You Record

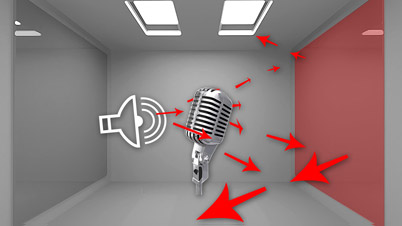
♦ Make sure your recording environment is quiet and free from background noise (check air vents, fluorescent lights, or computer fans). ♦ Record in a room with carpeting, padded furniture, and the fewest hard/flat surfaces possible. Place your microphone in an isolation box, or put a towel on your desk under the microphone to dampen reflected sound waves. Dampening the sound behind the narrator with blankets will avoid the audio bouncing into the microphone. The hard, reflective surfaces you don’t want. It becomes very, very live. It sounds like you are recording in an echo chamber. ♦ Turn off all electronics that might interrupt your narration (cell phones, email notifications, etc.). ♦ Do an ambient background noise recording with no speech to identify if any background noises will be intrusive on playback. By recording 10 seconds of silence, you have a way to sample just the ambient noise and use a noise removal process to filter it out later. If you happen to have ambient noise (like an air conditioner) you’ll be able to filter some of that out. ♦ Rehearse the script of what you plan to say. • Identify and practice any acronyms or difficult-to-pronounce words. • Determine a speaking tone/style for your narration, and identify words that might need special emphasis. • Write voice directions into your script (e.g., “spoken cheerfully” or “pause dramatically”). • Practice speaking your script out loud to eliminate pauses/hesitations and to improve flow.
Pressing the Record Button

♦ Always record your voice to a MONO TRACK (NOT STEREO)!! You've only got one mouth (I hope!) and one mic so you only need ONE Track. A stereo track wastes hard disc space and can have weird audio problems (phase shifting, artifacts, echoes) when mixed to mono. ♦ Sit up straight when you record, or try standing when possible for better breathing and audio. You’ll feel more energized and be able to breathe better. If you do sit, don’t slouch. Sit up straight and keep your chin out. Don’t let it drop to your chest. ♦ Listen to yourself periodically, and take notes on your likes/dislikes (phrasing, intonation, mouth position, etc.). Keep these notes handy for subsequent recording sessions. ♦ Experiment with the best time of day for your own voice and try to record at the same time of day for consistency. ♦ Don’t fidget when you record. It may interfere with your narration and force you to have to re-record. ♦ Don’t forget to breathe… ♦ … But pay attention to your breathing. Loud inhaling or exhaling sounds are irritating for the listener, though subtle natural breaths are okay. ♦ Take care of your voice. Have some water, herbal tea with honey, lemon juice, or throat lozenges handy, and take breaks if your voice starts to feel strained. ♦ Practice good vocal techniques like warming up your voice, watching your speaking speed, and practicing good pronunciation and intonation. ♦ Know when it’s “good enough”. Don’t spend hours recording and re-recording one sentence. ♦ Record multiple takes. People rarely nail a recording on the first take, so listen to the playback, and choose the best. What may take you a minute to re-record may take someone far longer to fix in post-production. ♦ If you make a mistake in a longer segment, keep the recording going and simply restart the narration from the beginning of the phrase or sentence. The unwanted part can be edited out later. ♦ Mark your mistakes. For mistakes you can’t fix in a new take, clap or blow loudly into the microphone as a reminder. This creates a spike in the audio waveform and is easy to spot later. ♦ Remember to remove your outtakes. Handing over a clean version of your recordings to your designer or producer will make life much easier for the both of you.
How Vocal Pops Occur

It turns out that these pops and thumps occur mainly on what are known as 'plosive' sounds, prime examples being words that start with the letter 'B' or 'P'. If you were to hold a lighted candle in front of your lips while speaking or singing 'plosives', you'd see the flame flicker, because we tend to expel a blast of air when making these sounds. By contrast, if you sing a sustained 'Ahh' sound, the candle will barely flicker at all, because you're mainly just producing sound vibrations with your vocal cords and expelling very little air in the process.
The problem is made considerably worse if the mouth is very close to a microphone. The plosive air blast is obviously strongest close to the mouth, and when it slams into the microphone diaphragm it produces a very large asymmetrical output signal. This may be so large that it can saturate the microphone's output transformer (if present) or overload the mic preamp, making the sound even worse. Engaging the low-cut filter on the mic (ideally) or preamp may ease the overloading problem, but the basic cause of the popping will still remain.
The problem is made even worse because all directional microphones suffer from the 'proximity effect', a bass tip-up which makes the microphone considerably more sensitive to low-frequency sounds from very close sources. A plosive blast is essentially low-frequency energy, and hence it translates into a loud, low-frequency thumping sound.
Capacitor mics of the type we use in the studio tend to be particularly susceptible to popping, because their diaphragms are very light, so some form of effective pop shield (or pop screen) is essential. Dynamic mics are a little more tolerant because of their more massive diaphragm assemblies, but they are by no means immune.
What Is A Pop Shield?

Even the best controlled singers (who naturally turn to one side or back off from the mic when singing loudly or plosively) tend to get microphone popping on occasions, so in most studios you'll see circular nylon-mesh screens that clip to the mic stand and sit a couple of inches in front of the mic. You can see how effective these are by trying the candle trick again. A good loud plosive with a pop screen between the mouth and the candle should barely disturb the flame. shield MetalMesh.Nylon-mesh pop shields can cause a slight dulling of the sound at high frequencies, but metal-mesh designs such as this one don't suffer as much.
There's nothing magic about these screens, and you can use ordinary stocking nylon to make one for yourself if you can devise some way to support it. At one time commercial pop shields were quite expensive, but competition has caused prices to drop to the point where making your own really isn't worth the effort.
The way the pop screen works is simple — sound passes through the fine mesh with just a little high-frequency reduction, but plosives are stopped dead. As the puff of air from the mouth hits the mesh, it breaks up, becomes turbulent, and loses its coherence, so what starts off as an organised mass of air ends up being randomised so that the air molecules are no longer all pushing in the same direction. It's simple, but it works! To make the screens even more effective, many designs incorporate two layers of mesh a short distance apart, so that anything that gets by the first layer is mopped up by the second. Such a screen will tame even the worst plosives. However, it is crucial that the windshield is spaced a couple of inches in front of the mic capsule — there has to be a volume of still air between the pop shield and mic capsule.
Engineering & Mastering
We have vast expertise in all aspects of the recording process. True creativity is always the foremost key in producing the magic golden sound. You will be astonished!
For those who need our mastering enhancements, SynthWizards operate a secure FTP server for remote file transfer. This FTP server allows clients who can't physically attend the session, to instantly and securely send files to SynthWizards. From your studio to our server and back, file delivery has never been more convenient! Contact SynthWizards for more information for uploading your audio file now.
Synthwizards Mastering delivers this by offering state of the art audio equipment, the latest in mastering software and upgrades, decades of mastering expertise and two newly designed mastering studios. Mastering is the last creative stage in the production of a record. It is essential for making that leap from what you mundanely hear to something you vividly visualize in your minds eye for imprinting deep impressions. Mastering is a chance to benefit from expert experience to create an engaging and dynamic record. This is time to even out the inaccuracies of your mix that you may not have heard before to maximise space, clarity, quality, and spectrum. With our sonically accurate analog and digital equipment and unsurpassed talents, your recording will have unparalleled production and power.
Synthesis (SYNTH) (from the ancient Greek "with" and "placing") refers to a combination of two or more entities that together form something new; alternately, it refers to the creating of something by artificial means. The corresponding verb, to synthesize (or synthesise), means to make or form a synthesis.

Wizard (WYZRD) n 1. a person who practises or professes to practise magic or sorcery 2. a person who is outstandingly clever in some specified field; expert 3. a wise man 4. computing a computer program that guides a user through a complex task adj 5. informal chiefly superb; outstanding 6. of or relating to a wizard or wizardry [ variant of wissard, from wise 1 + -ard ] 'wizardly adj wizard c.1440, "philosopher, sage," from M.E. wys "wise" (see wise (adj.)) ard. zynyste "magic," zynys "sorcerer," zyne "witch," all from zinoti "to know." The ground sense is perhaps "to know the future." "wise magical power!"

ControlVoltage
SynthWizards Network Directory
- Nihilist Records
- MuffWiggler
- MODULARGRID
- Doepfer MusikElectronic
- MFBerlin
- SynthaSystem
- AliensProject
- VintagePlanet
- SYNTAUR
- FONITRONIK
- Electro-Music
- Analogue Solutions
- SYNKIE
- ElectricDruid
- Music from Outer Space
- KVR VST Programming
- CK Modules
- Birth of a Synth
- DIY AudioFX
- Console Sound Modular
- FreeFrame Video Synthesis
- Pure Data
- PAIA
- ELECTRONOTES
- EML synth users
- PAIA synth users
- SequentialCircuits users
- VintageSynthRepair


MANUFACTURERS


DEALERS


 Modular Formats on eBay:
Eurorack (RSS) |
Frac (RSS) |
Modcan / Cynthia (RSS) |
Moog / Dotcom (RSS) |
Serge (RSS) |
Buchla (RSS) |
Wiard (RSS)
Modular Formats on eBay:
Eurorack (RSS) |
Frac (RSS) |
Modcan / Cynthia (RSS) |
Moog / Dotcom (RSS) |
Serge (RSS) |
Buchla (RSS) |
Wiard (RSS) Dealers on eBay: Rhythm Active (RSS) | abertronix (RSS) | Perfect Circuit Audio (RSS) | awakewalk (RSS) | analoglsd (RSS) | mechanical animals (RSS) | 123synthland (RSS) | Noisebug (RSS) | Novamusik (RSS) | Big City Music (RSS) | Geargasstore (RSS) | buyjapan001 (RSS) | be.on.ke (RSS) | akahardoff (RSS) | davlippo7 (RSS) | thestudiobaron07 (RSS) | zolophile (RSS) | Escape from Noise | tokywax (RSS) | conwayair (RSS) | au.s (RSS) | sir_analog (RSS) | yousenditworks (RSS) | synthartist69 (RSS) | technoempire (RSS) | gearlicious (RSS) | lighthouse_sound (RSS) | octave.7 (RSS)
Makers on eBay: Division 6 (RSS) | Folktek (RSS) | S-CAT (RSS) | AtomoSynth (RSS) | spunkytoofers (RSS) | panote09 (RSS) | Diabolical Devices (Class A) (RSS) | Chamber of Sounds (RSS) | squidfanny (RSS) | zebranalogic (RSS) | freeform-delusion (RSS) | drmoonstien (RSS) | Resonance Circuits on eBay (RSS) | Dementia Labs (RSS) | STARR Labs (RSS) | x0xb0xes (RSS) | Synthetic Sound Labs | TRAX | synthrotek (RSS) | clacktronics (RSS) | MOCM | BogusNoise | M-Z3R0 (RSS) | Freakenspeak (RSS) | Dr. Blankenstein on eBay (RSS) | Cynthia (RSS)
Accessories, Manuals, Parts, etc.: vintagevibes (RSS) | Vintage Planet | Technology Transplant (RSS) |
